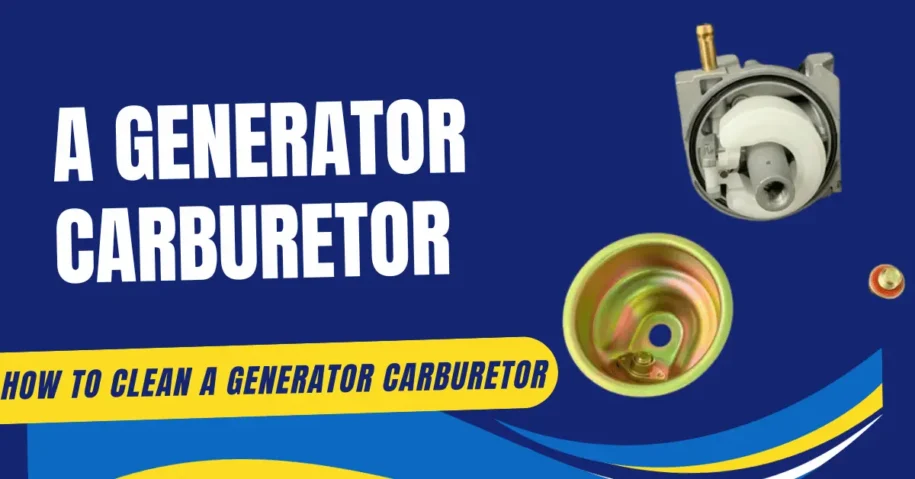
Any machine’s ability to operate depends heavily on its carburetors. They perform a large portion of the heavy lifting by giving the spark-ignition engine the perfect blend of fuel and air. A carburetor near your generator’s engine is subjected to much dirt, filth, and pollutants daily.
Individuals frequently make the costly error of neglecting the carburetor maintenance on their generators, which can result in significant damage. It is best to take care of larger, more intricate equipment, such as generators, as soon as you notice any damage.
Regular cleaning will guarantee the carburetor’s optimal performance and significantly improve its health. Unfortunately, because so many tiny parts must be taken out, cleaned, and then replaced precisely the same way, disassembling and cleaning a carburetor can be difficult.
The likelihood of losing some tiny pieces or forgetting how to assemble them is very significant for unskilled people. A more straightforward method must exist.
Why Do You Need to Clean Generator Carburetor?
The primary rationale behind carburetor cleaning is moisture attraction to today’s ethanol fuels. Corrosion within the carburetor and gasoline tank may result from this. The carburetor becomes clogged and performs poorly if ethanol gasoline is kept in the engine for an extended period because it evaporates and leaves behind a sticky residue.
Here are some things you can take to lessen the frequency of cleanings and minimize carburetor issues:
-
Use a Stabilizer
In addition to cleaning carbon deposits and enhancing fuel efficiency, fuel stabilizers assist in lessening carburetor issues brought on by ethanol fuel.
-
Empty the Fuel Tank
In the off-season, empty the carburetor and fuel tank after allowing the generator to cool. If there isn’t a drain on your carburetor, run the generator until the fuel tank is empty.
-
Don’t Use Old Fuel
In ideal circumstances, gasoline can last up to a year in cold climates with excellent gas cans. Stabilizers prolong the life of your fuel while reducing it in hot weather. Use fresh gasoline in your generator only.
A Few Signs to Indicate the Generator Carburetor Cleaning
Let’s take a look at a few indicators that your carburetor needs maintenance before we go into cleaning a generator. The fact that your carburetor would not start is one of the most significant indicators that it needs repair.
The engine would crank or turn over but not start when you turned on the generator. The carburetor may be unclean.
Roughly Running Generator
A dirty carburetor is the cause of both excessive fuel richness and leanness, manifesting as popping or chugs in the engine and black smoke. Fuel may overflow the carburetor bowl vents due to a blocked carburetor, soaking the spark plugs.
If your generator isn’t starting, spray some starter fluid directly into the carburetor to see if that’s the cause. Your carburetor has to be cleaned if it starts but won’t run.
How Does a Generator Carburetor Work?
The engine receives fuel and air in the proper ratios, prepared by the carburetor and sent into the engine. The basic carburetor construction comprises a float chamber and a mixing chamber.
In the first chamber, a float controls the fuel level to keep it steady. Through the nozzle, fuel is transferred to the mixing chamber. The air jet breaks it up as it goes through the atomizer, atomizing and mixing it with it. An air-fuel mixture that ignites readily is the end product.
Steps to Clean a Generator Carburetor
Before starting any maintenance or repair work, ensure the engine and muffler are cool. Access all safety instructions mentioned in your owner’s manual. Adhere to common sense. Prevent personal harm. Owing to gasoline fumes emitted by the carburetor, cleaning it in an area with enough ventilation is recommended.
1: Remove Carburetor
Ensure that the fuel-flow valve is shut. See the guidebook with your specific product to learn how to turn off the fuel-flow valve. Empty the carburetor after removing the drainage screw. Refer to the guidebook with your product to find out how to empty the carburetor.
Keep the gasoline intake line of the carburetor separate. Some fuel lines have a spring clip; push the spring clip off the intake port with the pliers as it may be attached to remove the fuel line. A tiny Phillips head on a hose clamp for different gasoline lines. If the fuel line gets caught, use a flat-head screwdriver to remove it from the fuel port.
2: Shut Off the Generator
Before commencing the carburetor cleaning process, the generator must be disconnected from any electrical source. Nothing you would want to do to endanger your safety more than cleaning an electrically charged generator.
Verify the device’s isolation and that there is no nearby running current.
3: Keep WD-40 in Your Hands
You must buy a can of WD-40 before proceeding. With a few quick sprays, you could cover the entire carburetor with a single can. While it’s a good idea to always have a can on hand for unexpected situations, you may get WD-40 Multi-Use Product online or at your neighborhood hardware shop.
4: Remove Air Box
Subsequently, extract the air box; typically, it is secured by a few fasteners. Before cleaning the generator’s carburetor, you must clear the air filter. Doing this lets you keep the air filter away from the essential components and concentrate on cleaning them.
5: Unscrew Removable Parts
Remove the generator carburetor’s detachable components, including the carburetor float, for optimal cleaning. This would enable you to clean the gadget and remove all contaminants thoroughly.
6: Clean the Carburetor
Now is the time to demonstrate WD-40’s magic. Grab your can and mist the carburetor with the liquid inside. Be careful not to overspay the liquid, which could damage the device. You can be confident that even when WD-40 is applied sparingly on the carburetor, it will still have sufficient potency to do its job.
7: Wash Out the Cleaner
Never begin cleaning away the liquid immediately after spraying it on your generator carburetor. Give the gadget a few minutes to rest so that WD-40 may do its job. In the meantime, the liquid dissolves infamous bonding and prepares the dirt for easy removal.
After allowing WD-40 to do its magic on your generator carburetor, give it a good rinse with clean water. This will assist you in cleaning the gadget of any remaining debris and contaminants. Water gives your carburetor a finishing shine and leaves it clear, but WD-40 takes care of all the cleaning jobs.
8: Reassemble the Carburetor
This will eliminate any indication that your carburetor is unclean and cause your alternator to run steadily. The carburetor may need to be adjusted following a significant blockage. In this scenario, we advise contacting a service center if the generator still operates poorly despite taking all the steps outlined in this article.
Your carburetor should be allowed to air dry after cleaning with clean water. Reassembling the components you took out in the fourth stage is possible once it has dried. Return every component to its original position and use the machine as you did before beginning the cleaning procedure.
Return the generator to the power source and check if it has started operating. You can then get professional assistance if the problem still exists and the machine won’t function as intended.
Final Words
Several of these methods are very effective at cleaning the carburetor in your home generator and could fix your issue for a few bucks. If those products are ineffective, consult the manufacturer’s website or the handbook with your generator to learn how to remove and clean the carburetor, or contact a small engine mechanic to do it for you.
Furthermore, remember that fuel stabilization and appropriate storage during the off-season can assist in averting future engine and carburetor issues.

